Create and Configure IBM HTTP Server for IFS Applications
This guide describes the steps for how to create and configure IBM HTTP
Server for IFS Applications. Some steps are prefixed with <platform>
(e.g. linux/aix or windows) and are mandatory only if you're using
this particular platform.
The IBM HTTP Server can be created either before or after the installation of
IFS Applications. However configuration must be done after the installation of
IFS Applications since it is dependent on files created during installation.
Contents
Create IBM HTTP Server
- RedHat/aix: Log on as root.
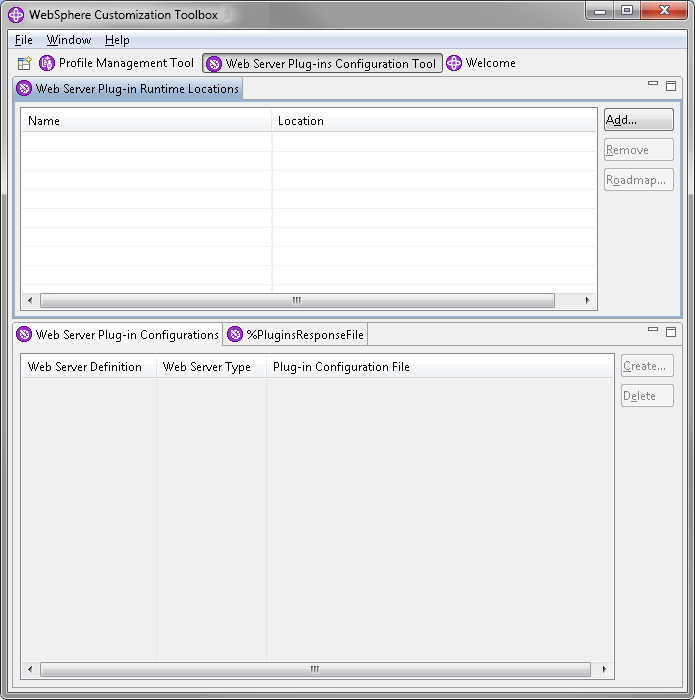
- Start WebSphere Customization Toolbox (<toolbox_home>/WCT/wct)
on the machine that is to serve the IBM HTTP Server.
- Click Add.
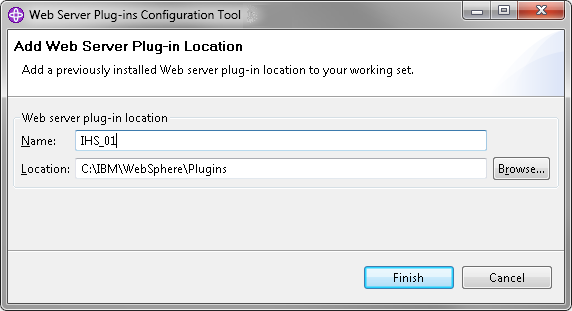
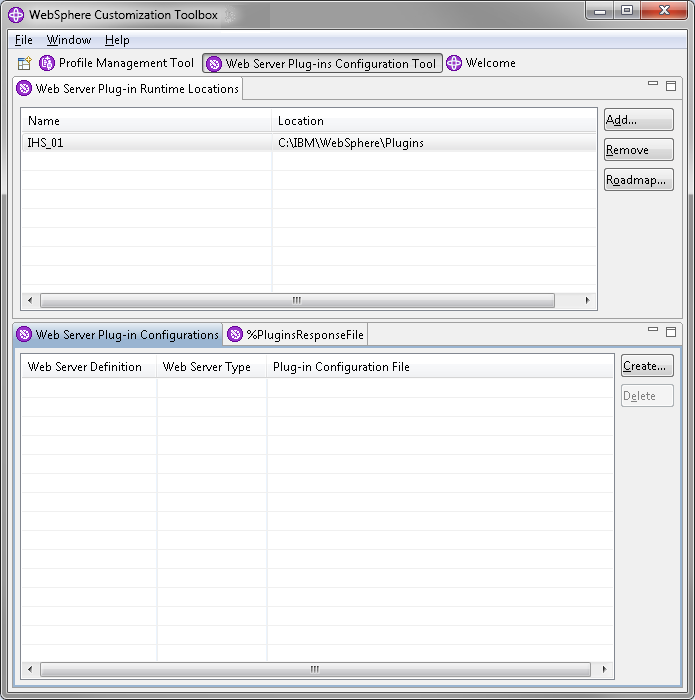
- Enter a name and the location of the Plugins folder and click Finish.
- Click Create.
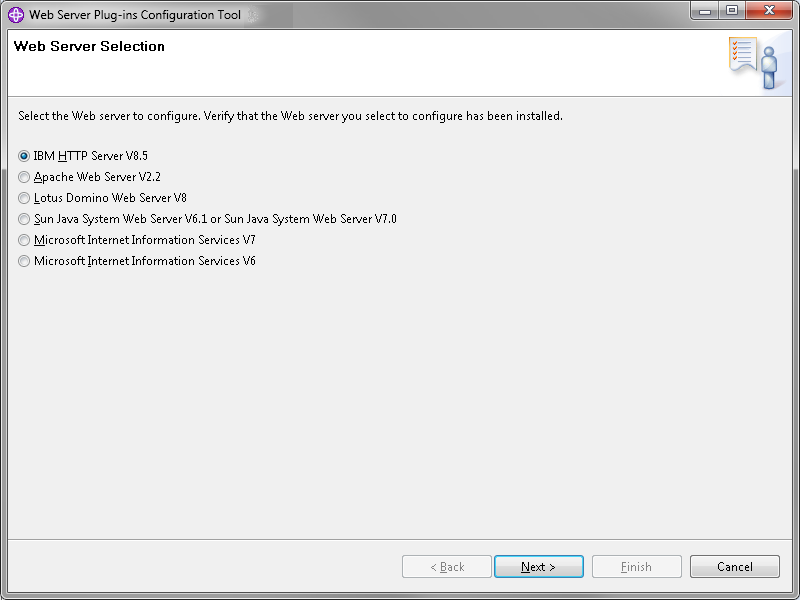
- Select IBM HTTP Server V8.5 and click Next.
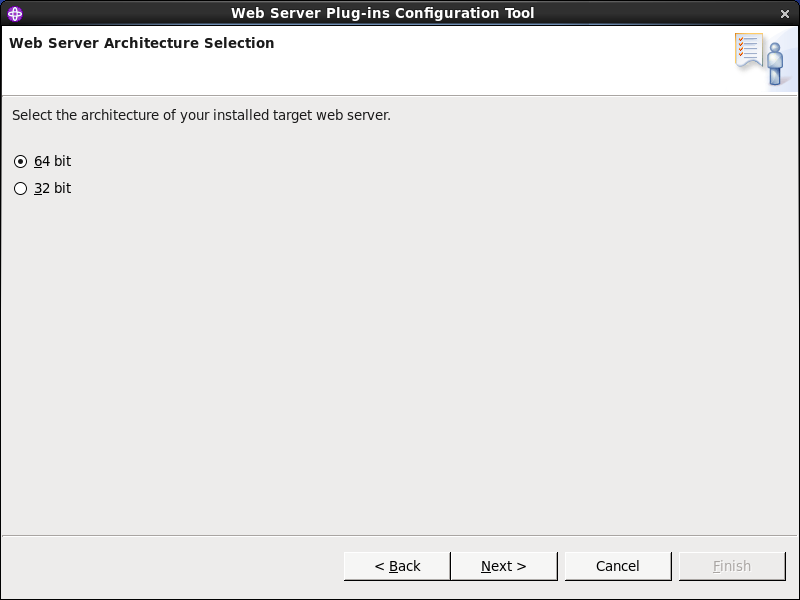
- RedHat/aix: Select 64 bit and click Next.
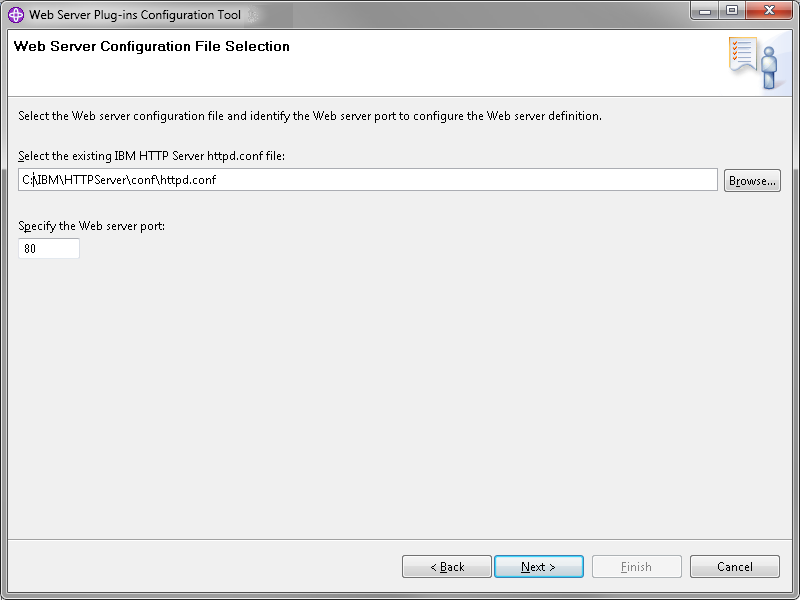
- Enter Web Server Configuration
- Enter the location of the httpd.conf file.
- Enter the port number.
Note: Avoid port conflicts!
If IFS Applications has been configured to run on port 80 choose another
port for the IBM HTTP Server
- Click Next.
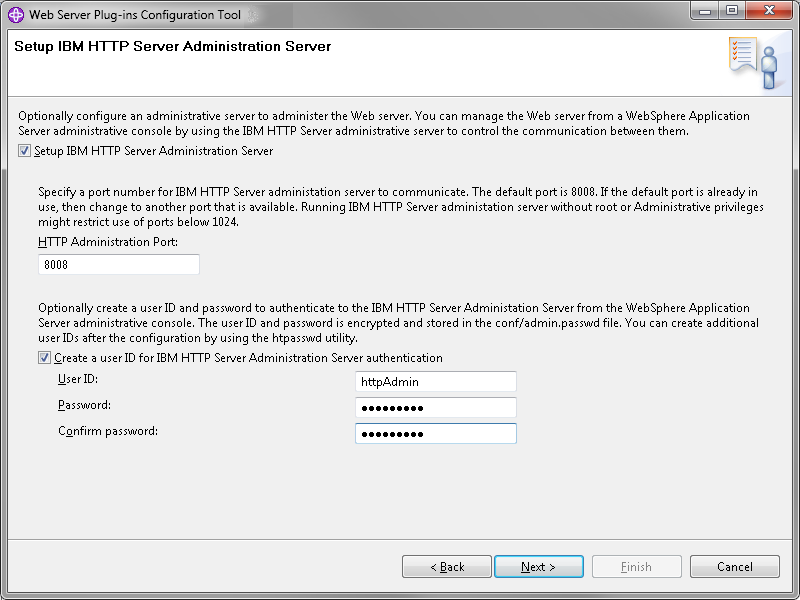
- Enter User ID and password for the IBM HTTP Server Administration
Security authentication and click Next.
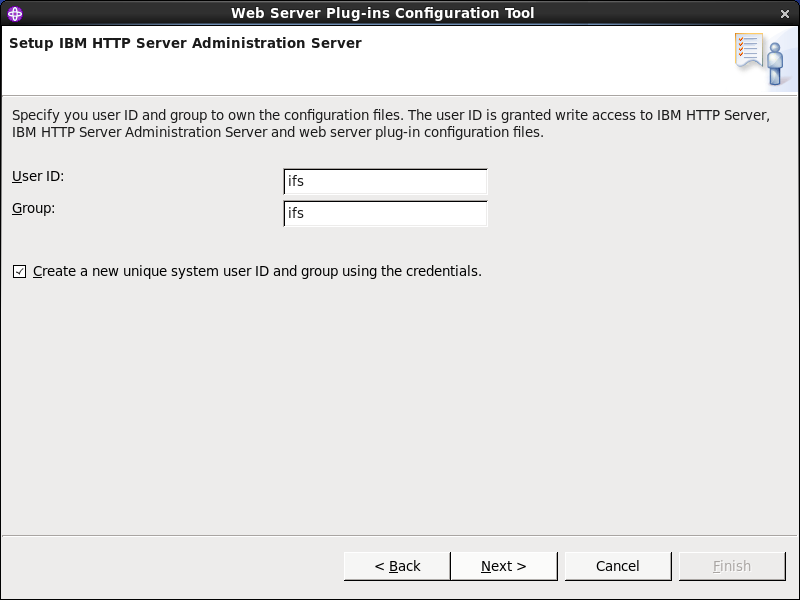
- RedHat/aix:
Enter <ifs user> as User ID and ifs
as Group.
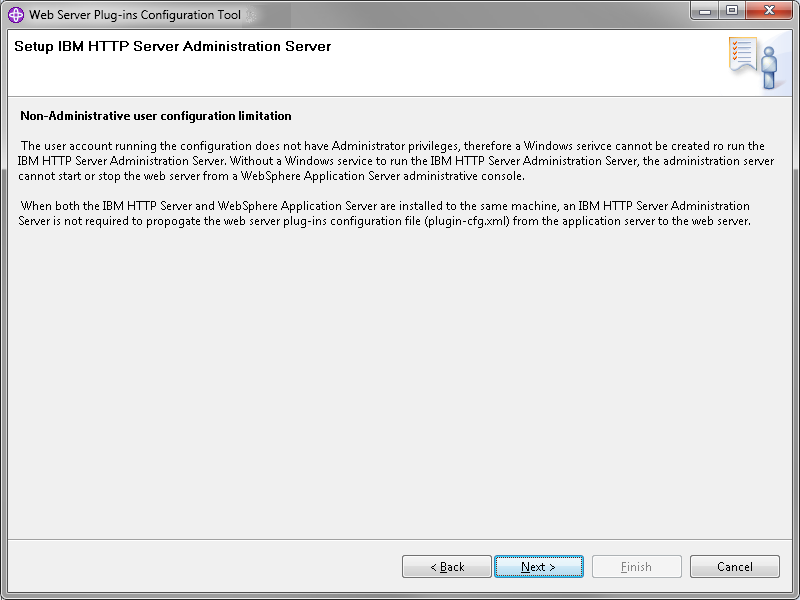
- Windows:
Users not running as administrators will see this.
Click Next.
- Windows:
Users running as administrators will see this. If
IBM HTTP Server should be registered as a service specify for which user
account and if it should be automatic or not, otherwise deselect the
button.
Click Next.

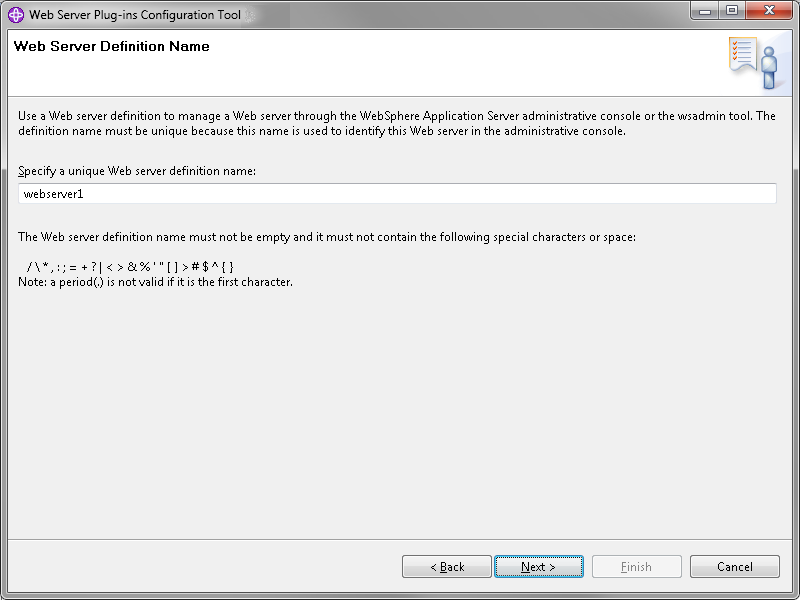
- Name the web server and click Next.
- Standalone configuration:
- Select (Local) Installation location of WebSphere Application
Server.
- Enter the location of WebSphere (i.e. <was_home>).
- Click Next.

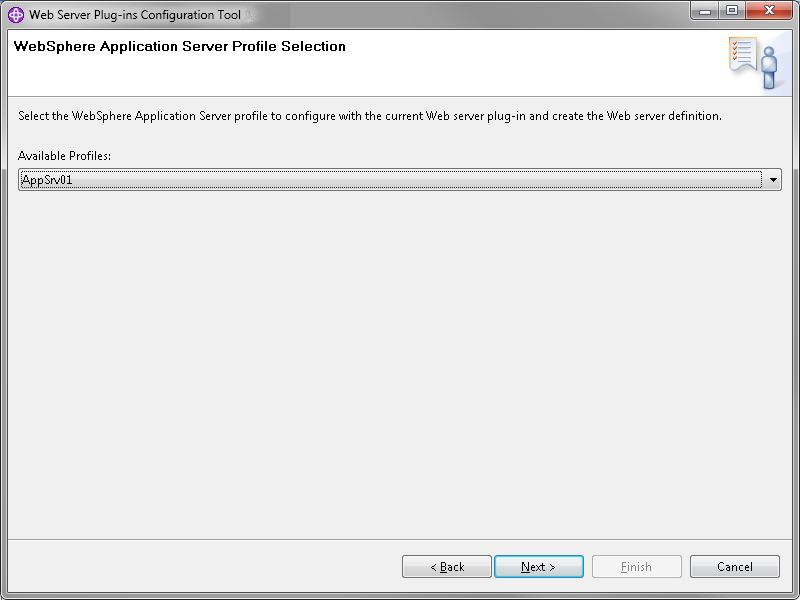
- Select profile to configure.
All profiles should be listed in the
Available Profiles: list.
- Choose the profile you wish to use and click Next.
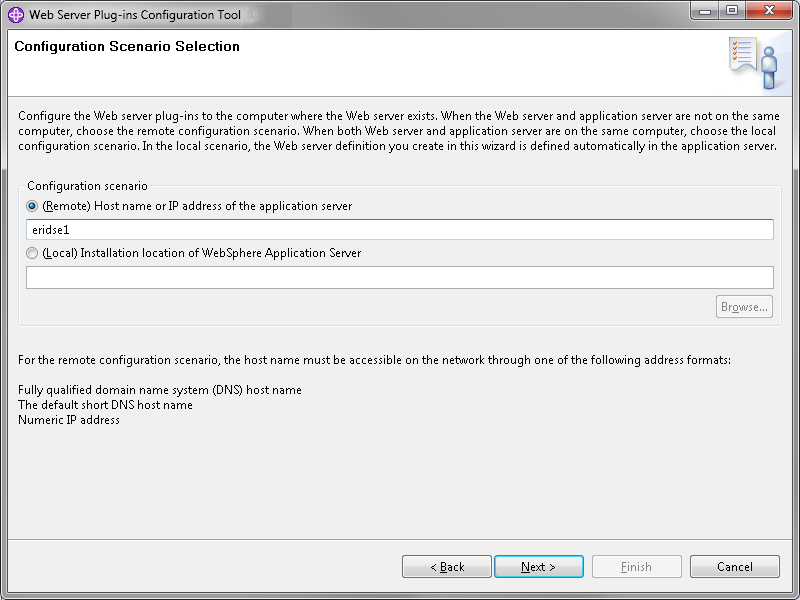
- Clustered configuration:
Note: If the deployment manager is on the same machine as the web server
you can do the same as for a standalone configuration (see above steps).
- Select (Remote) Host name or IP address of the application server.
- Insert the host name or IP address to the deployment manager (can be
localhost if on the same machine).
- Make sure that the deployment manager is started.
- Press Next.
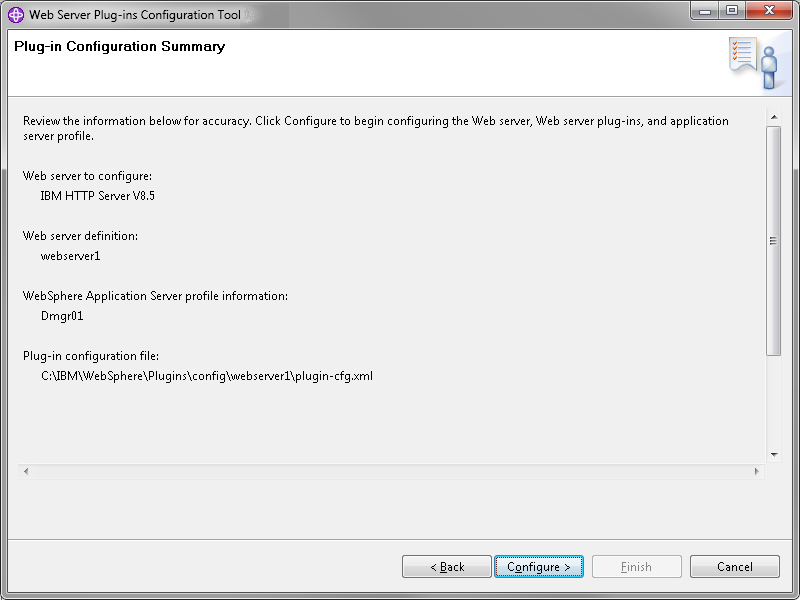
- Make sure the summary is correct.
- Click Configure.
Note: This might take a while in case
IFS Applications is already deployed on the server. The GUI will seem to
hang, but just be patient.
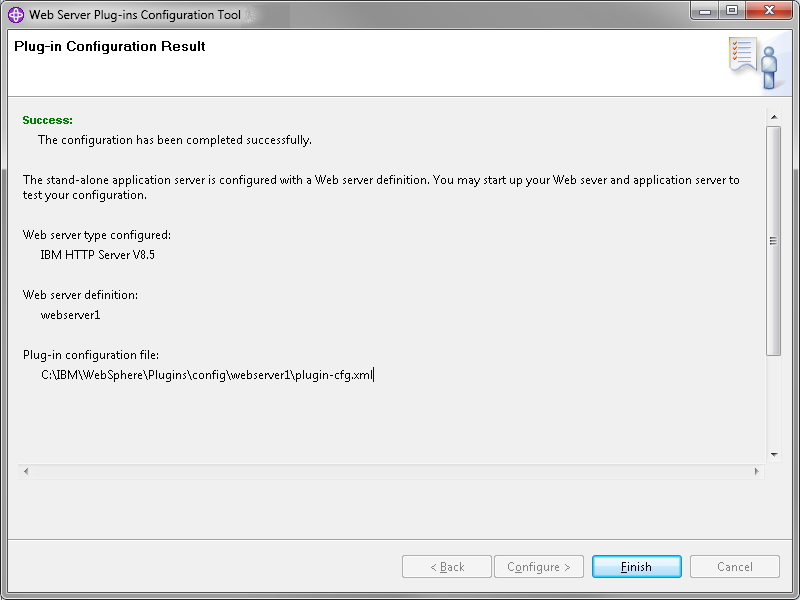
- Click Finish.
- Clustered configuration:
If you chose the local configuration scenario above, this and the next
step can be skipped.
- Copy the manual configuration script (from above) and paste it in the
bin folder for the deployment manager.
- Example: /IBM/WebSphere/AppServer/profiles/Dmgr01/bin
Note: The deployment manager may be on another machine.
-
Clustered configuration:
Execute the configuration file and verify that the configuration is
successful.
-
Clustered configuration:
Repeat on every machine in the
cluster that needs an HTTP Server.
Configure IBM HTTP
Server for IFS Applications
-
Copy the file
<ifs_home>/instance/<instance>/conf/httpd-websphere_<instance>.conf
to
<http_home>/conf
-
Edit the file httpd-websphere_<instance>.conf and modify the
lines:
Listen: <port_number>
<VirtualHost <host>:<port>>
ServerName <host>
Example:
Listen 10.200.30.400:58080
<VirtualHost eridse1.corpnet.ifsworld.com:58080>
ServerName eridse1.corpnet.ifsworld.com
-
Edit the file httpd.conf and make sure these lines are not commented out.
LoadModule alias_module modules/mod_alias.so
LoadModule expires_module modules/mod_expires.so
LoadModule rewrite_module modules/mod_rewrite.so
LoadModule speling_module modules/mod_speling.so
- Add LoadModule was_ap22_module and WebSpherePluginConfig
directives at the end of the file. (If this already exist you need to do
nothing)
Windows:LoadModule was_ap22_module "C:\IBM\WebSphere\Plugins\bin\32bits\mod_was_ap22_http.dll"
RedHat/aix:LoadModule was_ap22_module "/opt/IBM/WebSphere/Plugins/bin/64bits/mod_was_ap22_http.so"
- Add the following after the WebSpherePluginConfig line:
Include conf/httpd-websphere_<instance>.conf
- Exclude the following two lines (by adding a '#' in the front).
AddEncoding x-compress Z
AddEncoding x-gzip gz tgz
To be:
#AddEncoding x-compress Z
#AddEncoding x-gzip gz tgz
-
RedHat/aix: Grant permission for the web server.
Log on as root.
Set the <ifs user> as the owner of the profile of WebSphere
Application Server:
cd <was_home>/profileschown -R <ifs user> <profile_name>
-
Start (or restart) the IBM HTTP Server and make sure there are no error
messages during startup.
Windows:
Assuming the server is stopped, otherwise stop it in the same manner as
described below.
In the start menu open All Programs->IBM HTTP Server V8.0->Start HTTP Server
If the IBM HTTP Server has been configured as a windows service it is also
possible to start/stop from the service menu.
RedHat/aix:
Assuming the server is stopped otherwise replace start
with stop below.
In the terminal type
cd <http_home>/bin/

	./adminctl start
./apachectl start
-
Avoid port conflicts
This step is not a mandatory step and in case of no port conflicts this step
can be ignored.
In case both IFS Applications and the IBM HTTP Server has been configured to
listen to the same port the IBM HTTP Server will not start. This can be
solved by commenting out the listen line in httpd.conf file.
#IPv4 support:
Listen 80
To be
#IPv4 support:
#Listen 80
-
In a clustered environment
repeat for every HTTP Server in the cluster.
Configure the Nodes
Only applicable for a clustered environment
- Make a copy of <ifs_home> from the machine that hosted the installer.
- Paste <ifs_home> on all other nodes in the cluster. The file
structure needs to identical on all machines.
- Restart the appservers.
Open the WebSphere admin console and log in.
Go to Servers -> Server Types -> WebSphere Application Servers.
Select all appserver and click restart.
Wait for the servers to start and make sure there are no errors.
Verify
 |
Verify that the HTTP Server can be started. Open URL http://<host_name>:<port_number>. |
 |
Read the error message when trying to start the server and try to
determine the cause. |