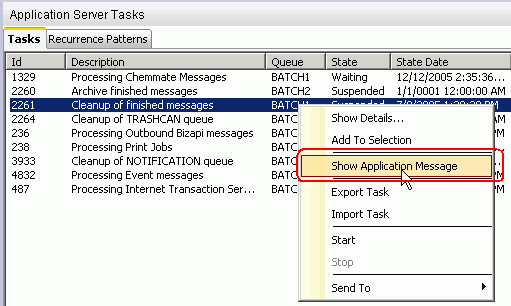
Application Server Tasks are those executable messages which will process other messages in the application server.
Read more about the concept Application Server Tasks
Application Server Tasks are executable messages which belong to a BATCH
queue. Typically an Application Server Task consists of the following main components:
Job Type:
Five types of jobs are supported.
TRASHCAN queue. Queue:
This defines the batch queue in which an application server task job should execute.
A batch server should be configured to execute messages on this queue.
Note: Refer to Message Queues for more details on how to manage message queues.
Interface & Operation:
The name of the utility handler and it's operation that is invoked from this applications
server task.
Job parameters:
The input parameters for the given application server task.
Recurrence patterns:
Usually an application server task is connected to one/more recurrence patterns
which define how often that task should execute. You have to follow the given status.
Application Server Tasks are normally scheduled tasks. Scheduling is done by adding recurrence pattern(s) to the given task. The feature Schedule Application Server Tasks in IFS Solution Manager is used to administrate the Application Server Tasks and Recurrence Patterns that are added to it.

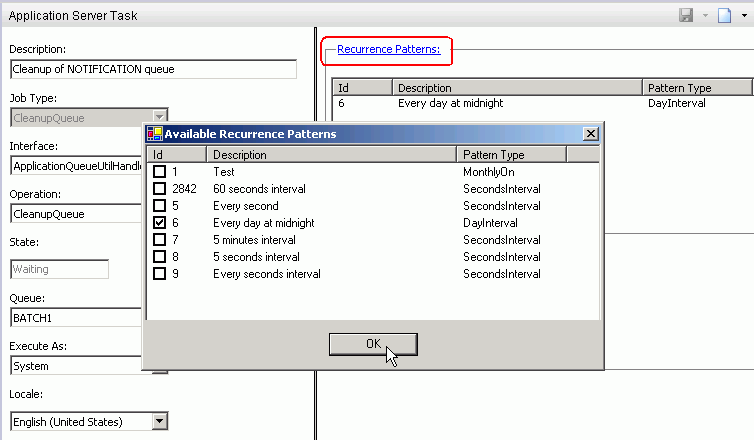
The recurrence patterns associated with a task defines how often the task will
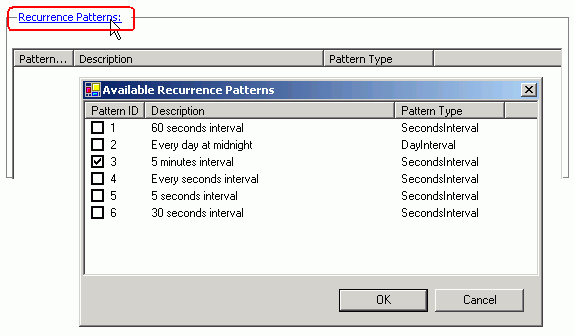
process. Go to the details of a task and click on the Recurrence Patterns
link, it will show all of the available patterns that can be associated to the selected
task in a popup window. You can select the patterns that you want to add to the
task by checking the check box in that window and then click Ok.
Recurrence patterns are used to control the execution pattern of application
server tasks. In the Schedule Application Server Tasks feature
select the tab Recurrence Patterns. Then click New toolbar button to
create a new recurrence pattern.
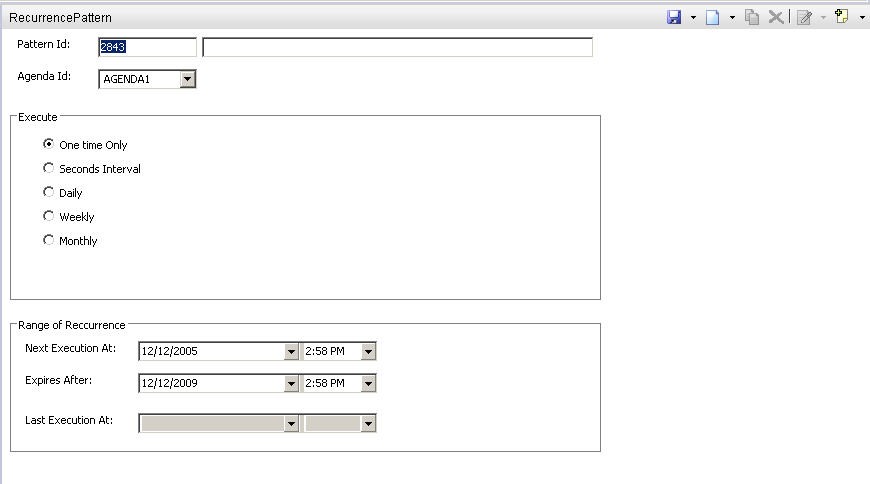
Application Server Tasks connected to a pattern, will be first executed at the
time specified in Next Execution At and continue to execute periodically
until the time specified in Expires After.
The following patterns are supported:

This type of pattern is used for 'One Time' execution.

To execute background jobs more frequently, 'Seconds Interval' type is used.

With this type its possible to execute jobs with an interval of one or more days.

Select the desired day(s) of the week to perform job execution.

Select required day(s) of the month for the pattern.
Here we can specify the day in two different ways, either by the date on which the execution should occur or by the day on which the execution should occur.
Example below show how to specify the last day of every month.

The installation will create a few essential Application Server Tasks in the system. With the feature Schedule Application Server Tasks, it is possible to edit them and create new tasks as well. In the feature, select tab Tasks and click the New toolbar button to create a new task.
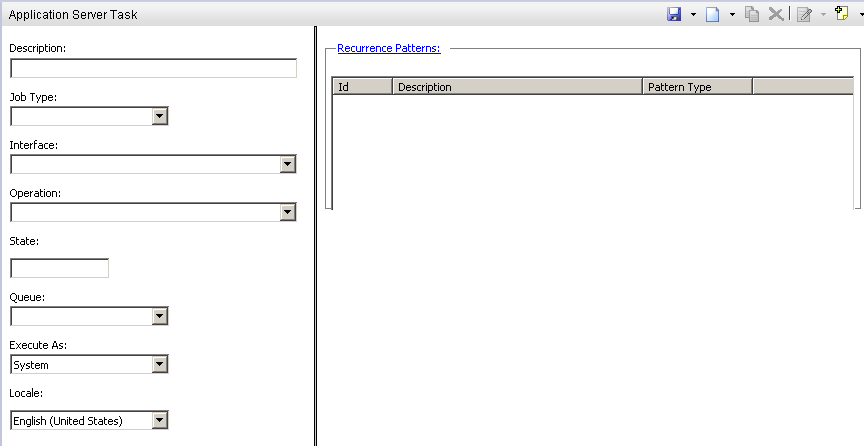
Select one of five job types.
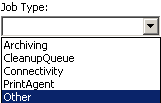
Once the job is saved, it is not possible to change the job type.
Select the interface name which should be used by the task. The available interface names depends on the selected job type.
Select the method name of the selected interface to invoke by the task.
The batch queue in which the task should execute is specified by this parameter. It will list all the batch queues defined.
The task should be executed as either SYSTEM or INITIATOR.
Default value is SYSTEM.
Specify the locale for the task execution. Default is set to English(United
States).
One or more recurrence patterns can be connected to a task so that it will be executed periodically. Click on the link Recurrence Patterns and check/uncheck the patterns in the popup window to add/remove the patterns to/from a task.
Depending on the job type, there are five types of job parameters:
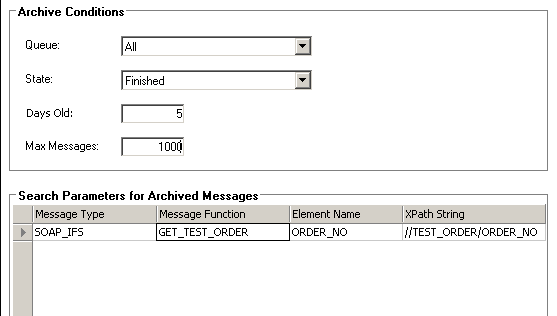
Queue:
Select which queue should be archived by this task. If 'ALL' is selected,
the archiving operation will run for all the message queues defined.
State:
Select the state of messages which should be archived. If 'ANY' is selected,
messages will be archived regardless of their state.
Days Old:
Messages older than this number of days will be archived.
Max Messages:
States the maximum number of messages which should archived upon execution of this
task.
Search Parameters for Archive Messages:
These settings define parameters for saving corresponding values in the message
archive search index when archiving a message. Element Name and XPath string refers
to XML data in the message body. These values are used when searching for messages
in the archived messages. XPath selection dialog can be used to select 'Element
Name' and 'XPath String'. It will be automatically popped up if either 'Element
Name' or 'XPath String' is empty. Otherwise, use RMB 'Show XPath Dialog'.
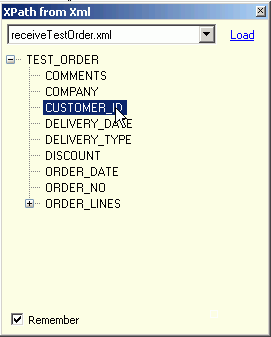
Load the required xml document and double click on a node to select its element name and the corresponding xpath string. The document will be saved in the local client profile if 'Remember' is checked. The RMB 'Clear' on XPath dialog can be used to clear the saved documents

Queue:
Select which queue should be cleaned up by the task. If 'ALL' is selected, the cleanup
operation will run for all the message queues defined.
State:
Select the state of messages which should be cleaned up. If 'ANY' is selected, messages
will be cleaned regardless of their state.
Days Old:
Messages older than this number of days will be removed.
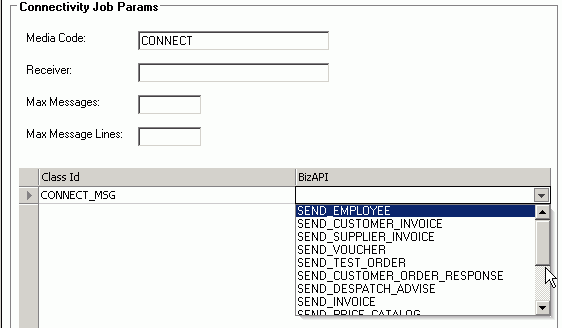
Media Code:
This code is used to match the intended area of the connectivity messages to be
processed. For example, connectivity messages handled by IFS Connect, media code
is set as 'CONNECT'.
Receiver:
This will match the recipient of the connectivity message.
Max Messages:
This will restrict the number of connectivity messages processed in a single call.
If no value is set, all the connectivity messages in 'Released' state are processed
in a single call.
Max Message Lines:
This will restrict the number of connectivity messages lines fetched in a query.
For example if there are 2000 lines and this parameter is set to 500 there will
be total 4 queries to the database for building the complete message.
If no value is set, all the connectivity message lines in one connectivity message
will be fetched in the same query.
Class Id conditions:
These are comprised of Class Id's and Bizapi names. Class Id will match the subset
of messages in a given media code.
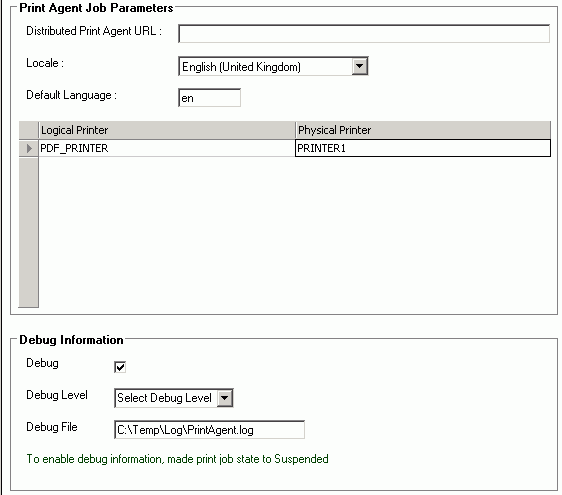
Print Agent Job Parameters
Distributed Print Agents can be used for several purposes like to relieve the
central application server of processing reports and rendering PDF documents, to
set up several Distributed Print Agents to achieve a load balanced environment or
to ensure fail-over capabilities, etc.
Specify the URL of the other extended server in the field Distributed Print
Agent URL field.
Locale and Default Language are those which the print
agent task will use unless other values are specified.
The PrintAgent job parameter consists of one or more logical printers
specified by a logical printer id and the corresponding physical printer.
Debug Information
Debug information will be used in writing a debug file. You should check the
Debug check box to enable debugging information. Debug Level
will determine to which extent the information should be written in the debug file.
Debug File specifies the output file in which the debug information
has written.
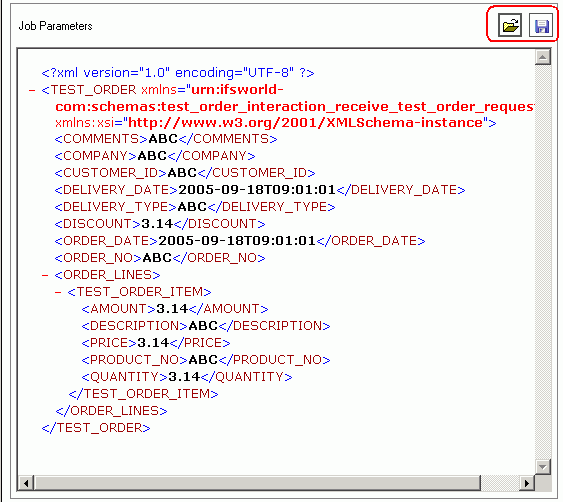
If it is required to specify a customized set of job parameters, use the 'Other' job type. Type your job parameters as an XML document in an external editor. And then load it to your task using the load a file button. You can save the existing job parameters as an XML file using the save to file button.
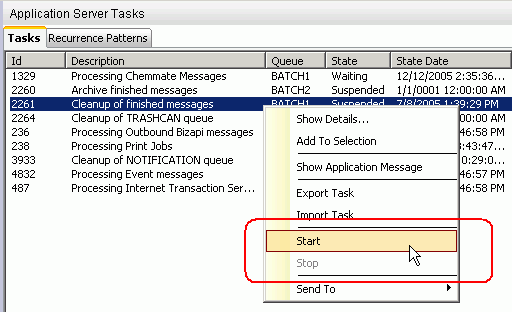
Note: Only available commands will be enabled for a particular task. Others will appear as disabled.
Export Task in the context menu using the RMB.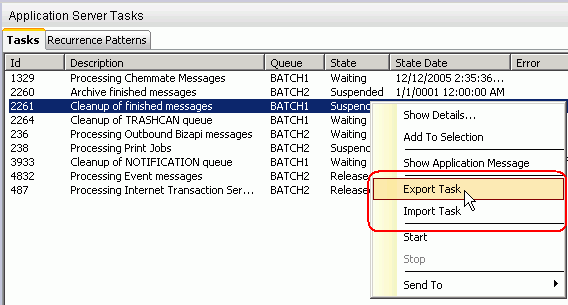
Save.Import Task.To view the associated application message for a particular task we can send
the job to the Message Queue feature.
Show Application Message using the context menu for
the task.