This section describes the process and steps involved in building a delivery using ISD 2.
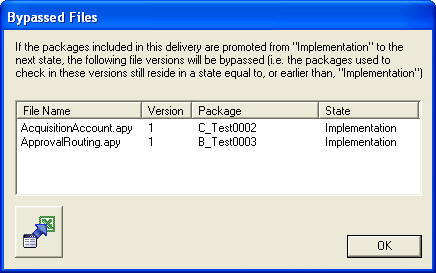
We assume you know how to create a .hewx file for your delivery. Open the hewx file using ISD 2. Before starting the build process its very important checking whether files in delivery have bypass issues. 'Check Harvest Bypass' action is available in Actions menu, RMB options and toolbar. Bypassed Files dialog shows filename, version, harvest package and the state of the package for bypassed files.
Files in the delivery should be downloaded using 'Download' action available in Actions menu, RMB or toolbar. It will create HarvestFiles folder inside download location to download files.
For more information on prepare delivery for build refer AQS document Wiki - IFS Solution Developer - Prepare a Delivery.
This section describes step by step build process using ISD 2 Build Engine wizard.
'Build' action in Actions menu, RMB options or toolbar is used to start the build process. This action is only available from the Delivery Tab.
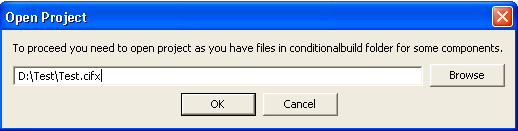
If project file is not opened and delivery has files in 'conditionalbuild' folder for some components it will popup following dialog. This is to fetch correct deploy.ini files which will be used by the Configuration Builder to identify the destination locations of the files in conditionalbuild folder when creating build structure.
If you have a previous build in your download location it will popup the following message.

If you click Yes it will create a backup folder <download_folder>\<delivery_name>_bak_<number> and copy the files and folders generated by previous build. If you click No it will clear the files and folders created by previous build.
Next it will popup the IFS Application Version Selection dialog.
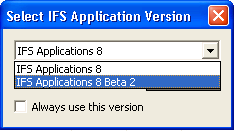
You should select the correct IFS Application version to build your delivery depending on the track which the customer is in. For IFS Applications 8 track it will use standard templates of Configuration Builder to generate install.tem. For IFS Applications 8 Beta 2 track it will use ISD specific template for install.tem instead of the standard template.
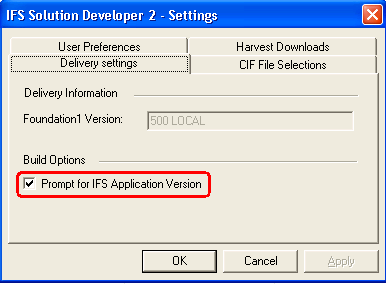
Option in following Delivery Settings dialog can be used to enable/disable prompt for IFS Application version.
In the first step of the wizard you have to provide build options.

If you choose the option to 'Build Locally' you should provide the path to Build Home. If the build home is on a network share you need to map it first. Build Home combo box will show all build homes available for all customer installations. If you choose 'Build Remotely' you should provide the Build URL.
If you select Database only from Build Options non-database files will be copied to ExcludedFromBuild folder and those files will not be considered for the build. If you select Full Build from the Build Options Ant script and MsBuild script will run during the build. You can select the ant/msbuild output method. If you select 'Write ant/msbuild output to log files' it will create a folder called Compilation_logs and log files (ant_compile.log and msbuild.log) will be created in that.
If you check 'Log Presentation Object Changes' a section to log presentation object changes will be written to Installation Template.
A summary of the options you have specified will be displayed in the next step.
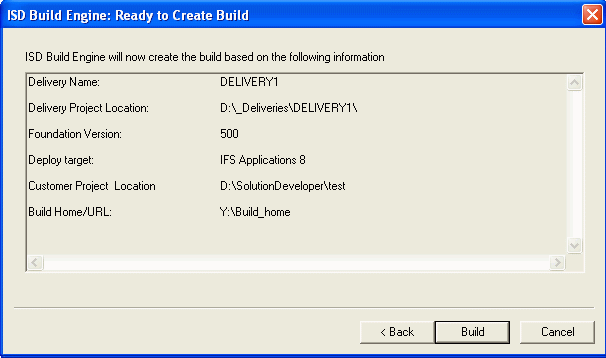
This helps you to review the information you have provided. When you click 'Build' button it will start the build process and create the build log file inside the download folder.
The following page will be displayed after the build is complete.
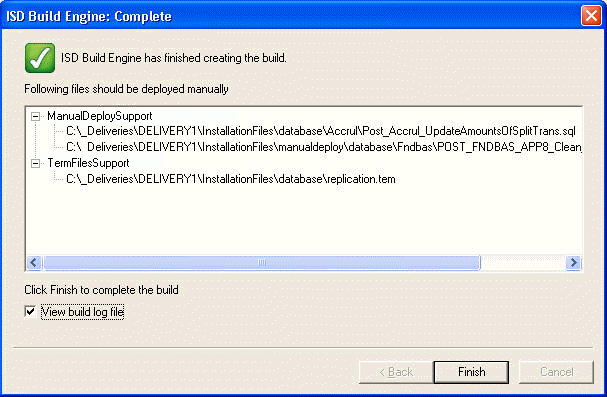
If there are files which need to be manually handled, they will also be listed as shown above. These files will be copied to ManualInstallation folder by Configuration Builder. For more information refer IFS Configuration Builder documentation. Note that ManualDeployPath parameter described in Configuration Builder documentation is the ManualInstallation folder path. Files copied to ManualDeploySupport folder are listed in FilesToHandleManually.txt created in ManualInstallation folder. Template files copied to TemFilesSupport folder are listed in TemFiles.txt. Folder structure of ManualInstallation folder will be similar to below structure.
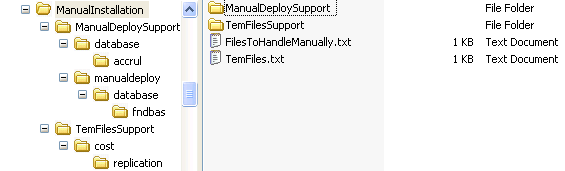
Files inside ManualDeploySupport and TemFilesSupport folders are the files that are not merged to the install.tem file. All files inside TemFilesSupport folder can be deployed by deploying the template files shown here. But regarding files inside ManualDeploySupport user need to analyze and decide whether need to be deployed or not. There can be two folders inside ManualDeploySupport folder as database and manualdeploy. Files in database folder are those that are not included in any template file and user should analyze whether these should be deployed or not. Files in manualdeploy are files that are in manualdeploy folder of component structure and user need to check and deploy these files.
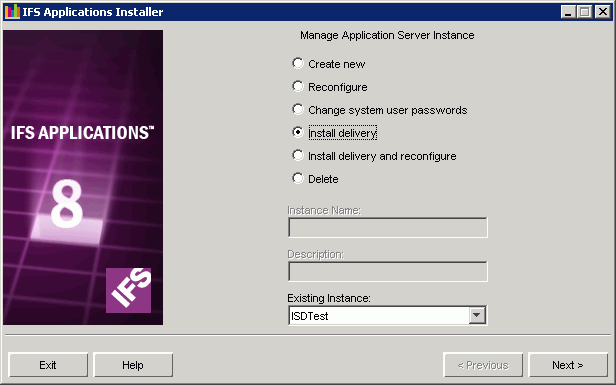
To install the delivery you will have to run the IFS Installer. You can install the full delivery with database, middle tier and IFS EE client using IFS Installer.
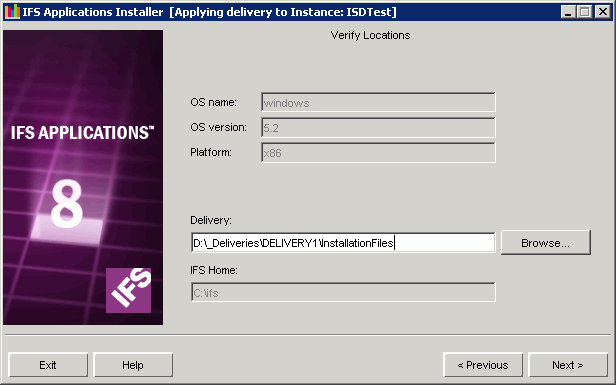
You should select Install delivery option at the first step and give the InstallationFiles folder in next step.
You can find more information about installing deliveries using IFS Installer in the Installation Guide.